
Quick content links to easily navigate through the article:
Table of Contents
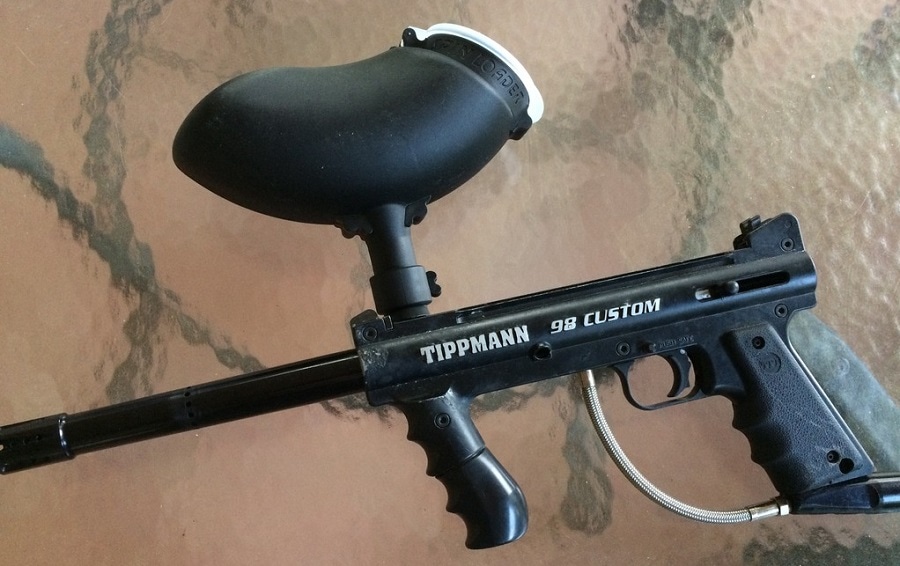
The Tippmann 98 Custom
Tippmann 98 Customs are one of the most popular paintball markers on the market and nearly everyone has one in their gearbag.
These suckers are built like tanks and have a long lifespan, even with little care. They have been the rental marker of choice (and in most cases still are) for many fields for the past couple decades for good reason as they keep working.
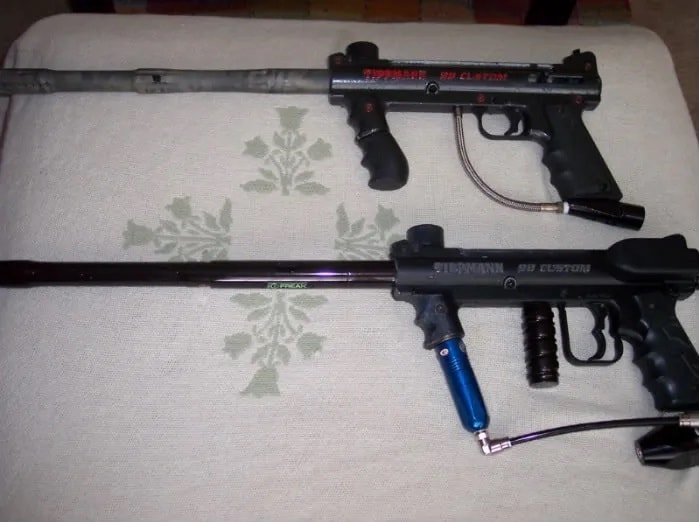
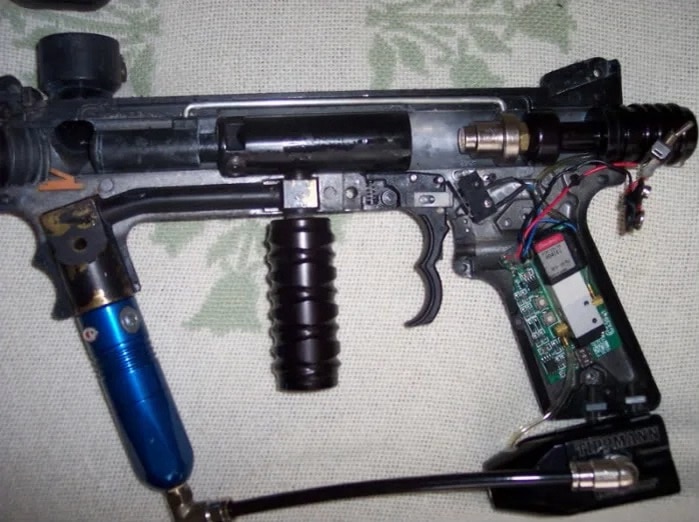
Pictures of some of my past 98 Customs. The one on top is a stock custom with a 32* barrel, second is my nice custom, low pressure, E-Bolt and internal mods:
Basic Maintenance and Lubrication
The most common thing you have to do with any marker is apply lubrication. You can use either synthetic gun oil or DOW 33 grease. I prefer DOW 33 because it lasts longer, but you need to disassemble the marker to apply it.
Here is what I personally use on all of my Tippmanns to keep them running smooth and can be found on Amazon at a great price:
1 oz Bottle of Gold Cup Paintball Oil – https://amzn.to/2BYcVvY
1 oz Jar of Smart Parts GR33SE – https://amzn.to/2Pwd81m
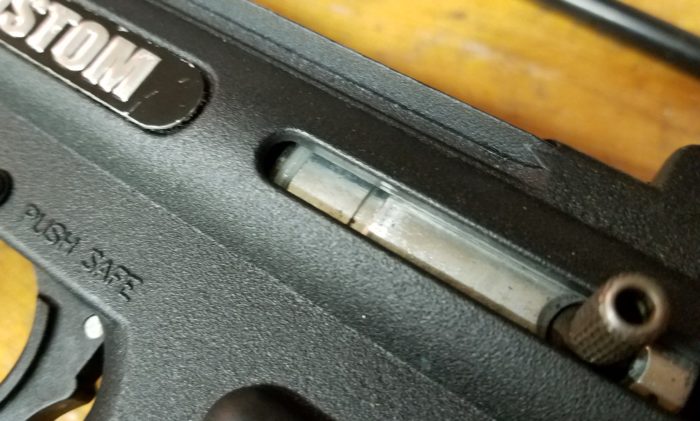
The 98 Custom has two main places where to apply the gun oil, the o-ring on the front bolt and the o-ring on the hammer. Making sure these two spots are properly lubricated will help prevent friction from wearing them out too quickly.
Picture #1 shows the hammer o-ring and #2 shows the front bolt o-ring. Just add a few drops of oil to those locations before you hit the field an you will be all set.

How to Disassemble Your Tippmann 98 Custom
Disassembling the 98 Custom can be a little overwhelming for someone who is new to the sport or doesn’t know the layout of the internals. I would highly suggest looking for the owners manual that the marker came with or looking it up online.
Click here to access the 98 Custom Owners manual on tippmannparts.com
To begin disassembly you MUST disarm the marker, take off the air source and remove all paintballs.
TIP: Before unscrewing the 6 restraining screws, leave the feed neck in the latched position so that it holds the front sight and spring in place. Also, loosen the screws holding the ASA a few turns(air source adapter, the part where the CO2 tank and Compressed air tank goes into).
Take your 1/8″ allen key and unscrew the 6 screws in the following locations; front sight, front grip, next to the safety, rear sight, above the grip, and bottom of the grip. If you have the plastic/rubber sleeve that goes over the cocking handle, slide that off. If the rubber sleeve is hard to remove, I have found that if you put a screwdriver under it and lift it off from the bottom it comes off easier.
From here you should be able to lift off the left side panel, revealing the internals. There are a lot of small parts that may come out and get lost, so be sure to look at the half that you just took off and make sure their aren’t any parts hanging off or still attached. I have found it easier to place all the parts on the right half so I can see everything at once.
Pictures of the 98 Custom internals for both stock 98C and E-Bolt with Low pressure kit:
The newer 98 Customs may look a little different around the trigger group and hose assembly into the valve. But for the most part, the rest is the same.
The major items you want to keep track of are all the little pins that make up the trigger assembly and the orange ball detent under the front bolt.
The pins keep the trigger, trigger sear, and sear spring in the correct position and can slide out quite easily so be careful and keep an eye on them.
The orange part is the ball detent. This prevents the paintballs from double loading in the breach or just rolling out the barrel. It is a good idea to inspect the detent and make sure the front part sticking up isn’t pressed flat to the bottom. If it is, you will need to replace it. Click here to pick up a manufacture replacement from one of my favorite sellers on Ebay.
Make sure the ball detent is placed in the breach correctly (see pictures above). If placed backwards, the bolt will either stop short or cut the detent in half.
Cleaning the 98 Custom Internals
With the two halves separated, it is now easy to clean the bolt and hammer. First, remove the rear cap where the main spring inserts into all the way in the rear of the marker. This removes the spring tension on the system allowing you to easily remove the hammer, linking arm and front bolt.
The hammer is made of 3 parts; the hammer, the internal plug, and the cocking arm. You will notice that the spring goes in this part when all 3 parts are assembled correctly. You may have to rotate the cocking arm to fully reinsert the main spring.
When cleaning old broken paint or gunk from the breach or hammer channel, take a damp rag and wipe off the front bolt, hammer, and the channels where they slide back and forth. After they are dry, apply paintball oil or grease to the locations you just wiped down. Make sure to put a little oil on the bolt and hammer o-rings to help prolong their life.
I like to use Dow33 grease for the main friction points on the bolt bodies as it provides long term lubrication compared to the oil, but you still want to use synthetic paintball oil on the o-rings themselves.
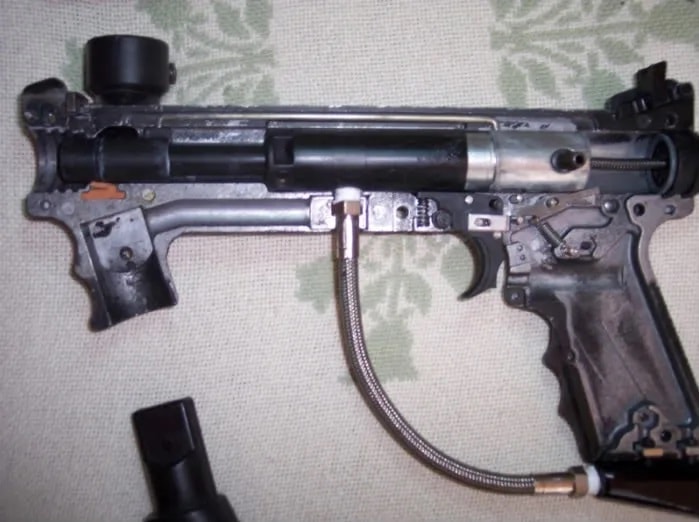
Tippmann 98 Custom Valve Disassembly
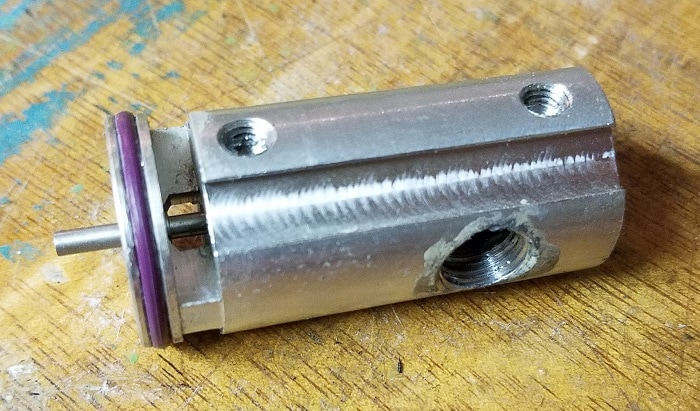
Lets go over how to disassemble the Tippmann 98 Custom Valve. The one pictured below is an older version, the newer ones don’t have a threaded hose input. Disassembly is still the same. My o-rings are different colors as they are part of my master o-ring kit from Flask Paintball. You can pick up some by clicking here to go to their EBay shop.
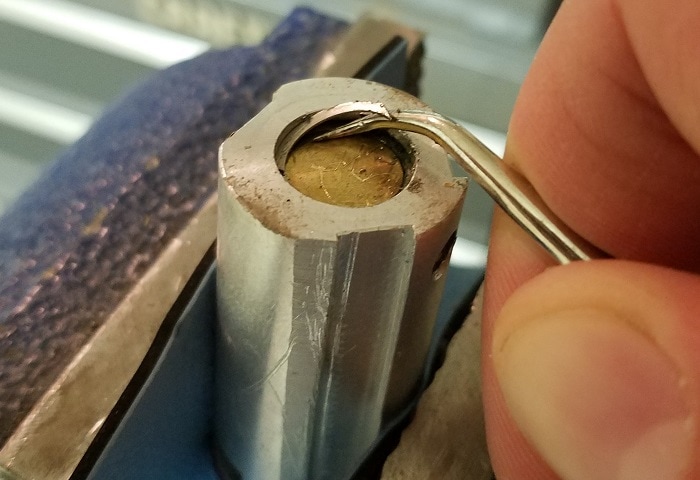
The 98 Custom Valve can be a PAIN to open up. This is primarily due to the spiral retaining ring. There are tools to assist in the removal and installation of the retaining rings, but it can be done with a sturdy o-ring pick or small flat screwdriver.
I highly recommend placing it in a vice to hold the valve still. No need to apply a lot of pressure and put some cushion to prevent damage. Start by simultaneously pressing down on the brass portion, depressing it into the valve and prying the retaining ring loose.
Once you have the retaining ring is removed, you can then remove the valve internals and inspect the o-rings. If the valve was leaking, check both o-rings and make sure they haven’t turned to goo. Inspect the front valve seat and cup seal for damage.
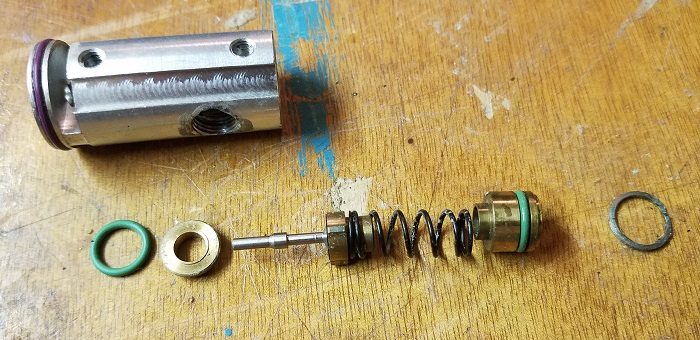
When putting everything back in the valve, place the o-ring first and then insert the front valve seat firmly in place with a dowel or middle of a barrel swab. Then lightly oil and insert the rest of the internals.
Installing the retaining ring can be just as much of a pain as taking it out. Start by spreading out the ring, pressing the brass valve plug into the valve and inserting the ring around the inner groove. Once it is in, you are all set!

Reassembling Your 98 Custom
Reassembly is exactly the reverse of disassembly. Make sure the ball detent is placed correctly and all the pins are in the correct locations. Refer to the pictures posted and/or your owners manual of you are uncertain.
Tip: The main things that will get in your way when putting the halves back together are going to be the trigger guard, ASA screw assembly, and rear sight. with practice this will become easy.
Some other things you can do to help prolong the life of the marker is put about 5 drops of oil into the ASA, air it up and shoot it a few times. This will put some lubrication into the valve lubricating the internal o-rings.
Tippmann 98 Custom Modifications
The mods that I have found to be most effective are polishing the internals, lightening the trigger spring, and eliminating hopper wobble.
Polishing the Internals
Polishing the internals can be a pain but will prolong the life of the internal parts. The older 98 customs have some excess over-spray from the outside in the hammer and front bolt channels. This can cause excessive wear on the moving parts.
I have found that the best way to clean out the over-spray is with a small rotary buffing tool like a Dremel with a buffing wheel and buffing compound. You can do it by hand with sandpaper too, start off with 500 to 1000 grit paper and polish it off with 2000 grit for best results.
The locations you will want to focus on are the front bolt channel, hammer channel, linking arm channel, and the trigger grouping face (where all the trigger pins are). Don’t take off too much material, just do enough to smooth everything out.
This won’t be a quick job. The last time I did it with a buffing tool, it took me a good hour or so to get both halves cleaned out to my liking. Make sure you clean/rinse out all the excess buffing compound and metal you took off.
One of my halves after a few years of play and some DOW 33 still on it:
Lighten the Trigger Return Spring
The trigger return spring on the stock markers are quite stiff. This is a quick fix, just take a clicky pin and take out the spring, cut to size and replace the stock spring. Super easy to do and costs you one pen.
Eliminate Hopper Wobble
The way to eliminate hopper wobble is to wrap an o-ring around the feedneck base, adding extra material between the body and the feedneck.
To do this, just wrap a regular tank o-ring (or similar sized) around the base of your feedneck as shown below. To remove your feedneck, just unlatch it by pressing down on the front sight and pulling the feedneck back towards the trigger.
Take your o-ring and wrap it around the bottom of the feed neck where the pins are at, stretching the o-ring and stopping just below where the paint feeds. This will put more pressure between your feed neck and the body and will not let the hopper wobble at all.
Prevent Paint From Popcorning
Sometimes if you are low on paint, the balls in the feedneck will blow back up in the feedneck after each shot. This is caused by the residual air slipping past the bolt and shooting up the feedneck.
This popcorn effect can be reduced by simply drilling a few holes in the back of the feedneck. This allows the air to escape out the holes rather than forcing its way up and out through the hopper.
Common Questions
Q: Can the 98 Custom use Compressed Air/HPA?
A: Yes it can and you don’t need to change any internal parts. You may need to increase the velocity if switching from CO2 to HPA, but the marker will function exactly the same.
Q: Is the 98 Custom considered a woodsball marker or a speedball marker?
A: It is commonly accepted that the 98 Custom is considered to be a woodsball marker because it is longer and has more comedic modifications/upgrades for it to make it look like an actual firearm. There are some upgrades to make a 98 Custom fit in a bit more to the speedball field and increase the overall functionality of the marker. Examples are the E-Grip and E-Bot (an electro-pneumatic controlled ram) allowing for higher rates of fire than the stock mechanical trigger and a double trigger upgrade kit.
Q: What are some upgrades I should get?
A: Well, if you want more accuracy, get a new barrel. If you want speed and you have one of the new 98 custom pros, get the e-grip upgrade, if you have an older model like I do, pick up an RT upgrade kit.
My highly suggested upgrades for this marker:
- New barrel (use quality paint and a decent barrel for best accuracy)
- Electronic hopper (a motorized hopper will reduce the chance of chopping paint)
- Double trigger (much more comfortable than the single trigger)
- On/Off ASA (makes it easier to remove the tank)