
Table of Contents
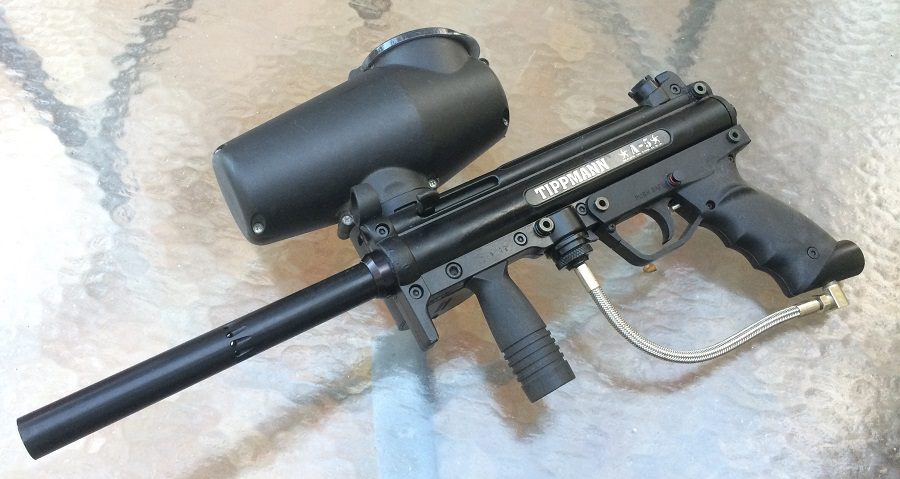
The Tippmann A-5
Tippmann A5s are one of the most popular Woodsball and Scenario Paintball guns of for many paintball players as they come with the cyclone feed system and are easily upgradeable.
There are a lot of similarities between the Tippmann 98 Custom and the A5 (and by extension, the X7 Classic). The A5 is an easier to maintain version of the 98 Custom while maintaining a high level of reliability and long lasting performance.
Tippmann A5s are highly upgradeable and are the base for many paintball projects. Here are two of my past projects below:
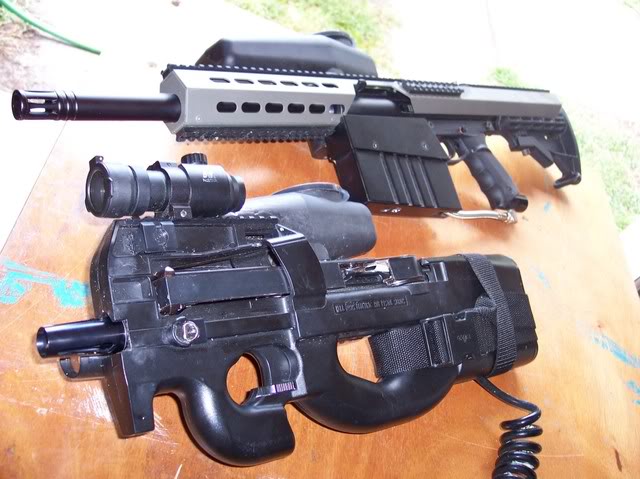
The A5 on top has the long discontinued OpsGear 50 cal sniper rifle body kit, low profile hopper, and 5 position stock. The one on the bottom was my custom P90 A5 mod where I slapped an E-Griped A5 inside of an airsoft P90 body.
Basic Maintenance and Lubrication
The most common thing you will have to do with any paintball marker is to apply lubrication. I personally use both synthetic gun oil or DOW 33 grease and prefer using DOW 33 because it lasts much longer.
Here is what I personally use on all of my Tippmanns to keep them running smooth and can be found on Amazon at a great price:
1 oz Bottle of Gold Cup Paintball Oil – https://amzn.to/2BYcVvY
1 oz Jar of Smart Parts GR33SE – https://amzn.to/2Pwd81m
In order to apply oil and grease, you will need to field strip the A5 as the bolt system is fully sealed within the marker itself. Thankfully it is simple and easy to do. Continue below for disassembly instructions.
How To Disassemble Your Tippmann A5
Disassembling the A5 is much easier than the 98 Custom as you can access the vital components by just removing the push pins. For a full disassembly you will still have to unscrew the clam shell halves, but 95% of the time you will just have to field strip the A5.
You will want to disassemble the marker after every day of play to ensure the longevity of the marker.
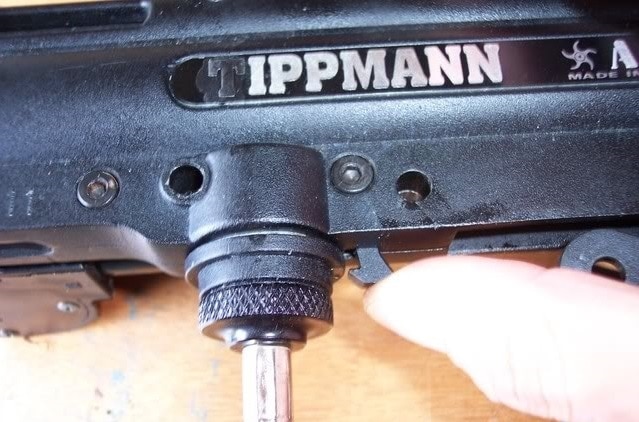
To begin disassembly you must disarm the marker by removing the air source and all paintballs.
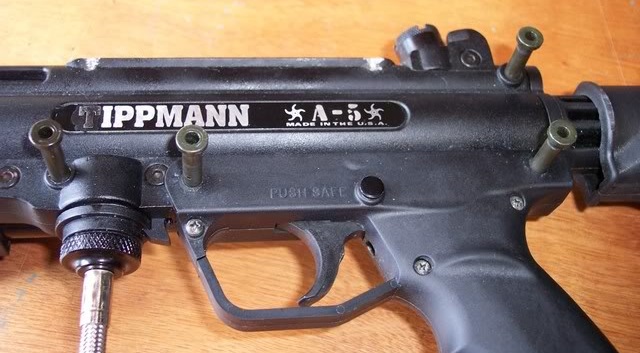
TIP: Before disassembling, screw in the velocity adjuster on the right hand side so the valve assembly can slide out freely and not snag on the body. Also, press in your safety button to the “safe” position. This will help hold your trigger assembly together when you remove it from the frame.
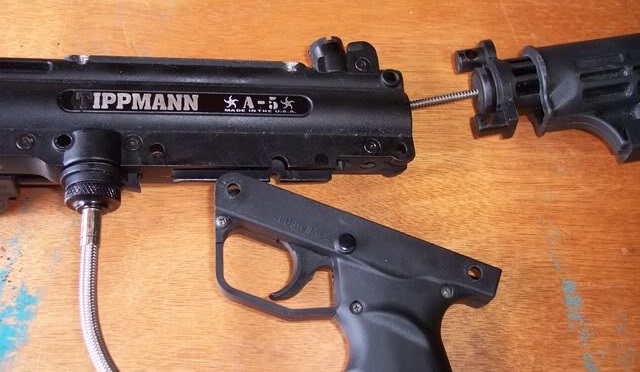
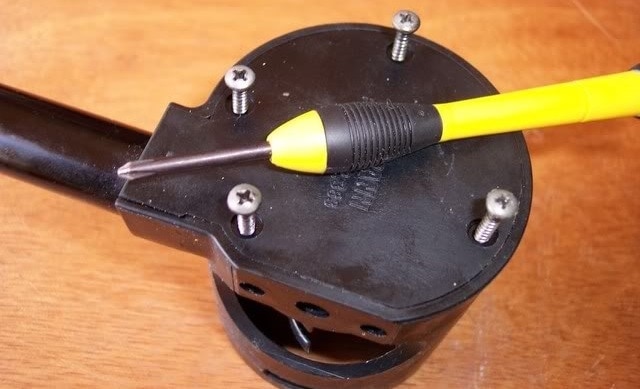
To begin disassembling your A5, remove the 4 push pins as shown below. You may have a hard time pulling them out if they are new or if there is dried paint inside, but you can push them out from the other side with a screwdriver or large punch.
After removing the push pins, remove the grip frame and back cap (or buttstock as shown in the pictures). Keep an eye on the main spring and spring guide as they sometimes like to go flying, so remove the back cap slowly.
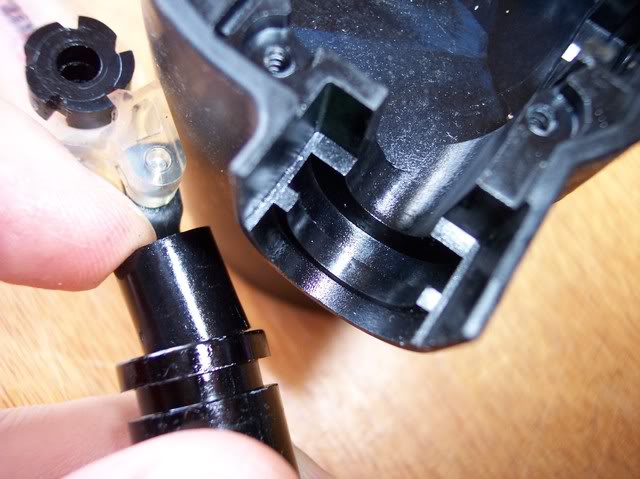
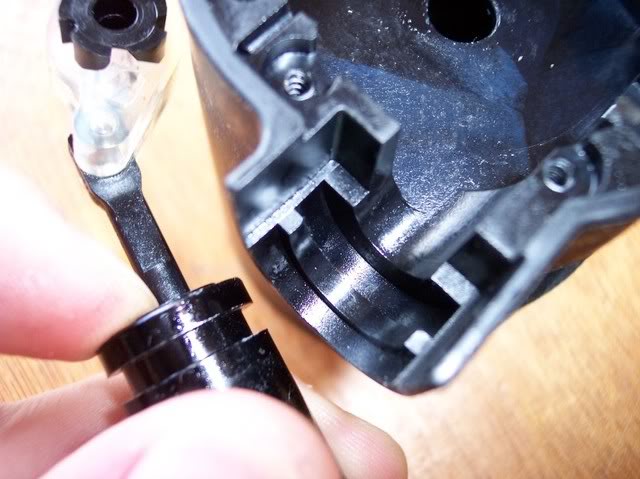
Finally Remove the hose assembly be releasing the tombstone retention latch as shown and pulling the hose downward. This will allow you to completely detach the grip frame from the body and allow the bolt assembly to freely move and slide out the back.
TIP: If the bolt assembly does not freely slide out the back, give the body a shake up and down to see if it will slide out. If not, you can use one of the quick strip pins or a screwdriver to slide the bolt assembly out by pushing on the rear bolt through the grip frame hole on the bottom.
If that doesn’t work, loosen the screws with a 1/8″ allen key. If it still won’t slide out, check your velocity adjuster screw and make sure it is screwed in enough to slide the valve out
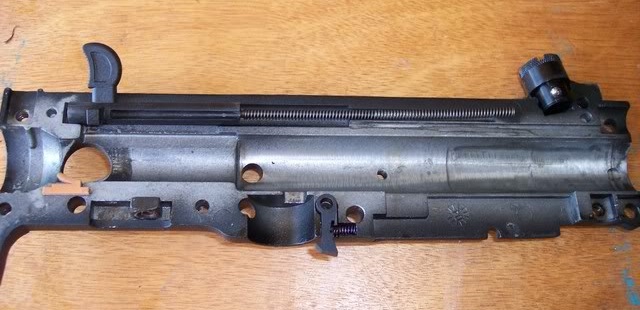
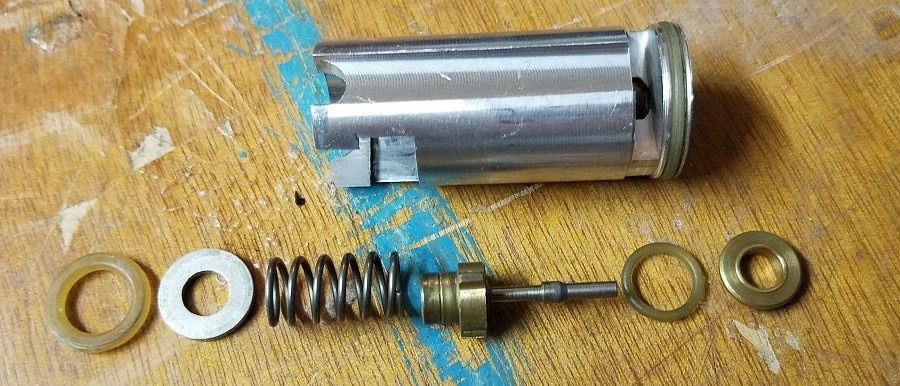
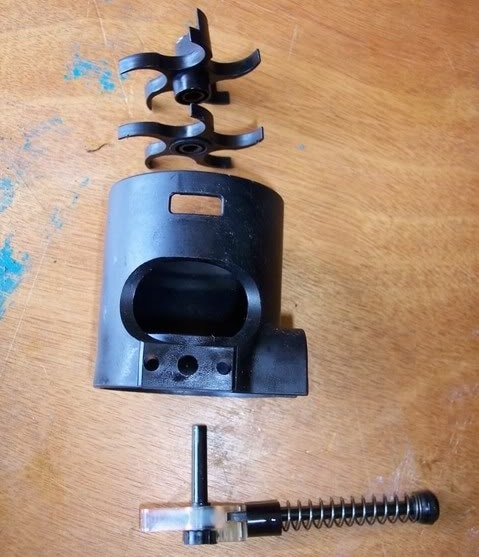
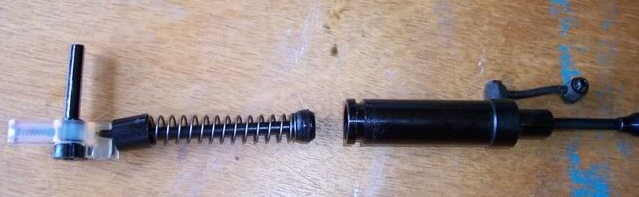
Removing the bolt assembly will remove everything at once and when your done you should have the front bolt, valve, rear bolt, linkage arm, spring assembly, back cap, and trigger frame assembly as shown below.
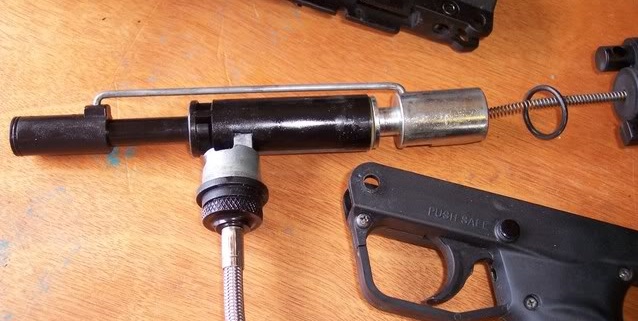
All the parts will look like the picture above inside the gun when assembled, ( note that the ASA/hose/tombstone assembly has been fitted back into the valve itself and just slide out).
Cleaning The A5 Internals
When cleaning out dirt and old broken paint off of the the front bolt or hammer, use a damp rag and wipe off the components and let them air dry. Afterwards, make sure you apply a few drops of synthetic paintball oil on the o-rings to help prolong their life.
You can also use DOW 33 grease on the bodies of the bolt and hammer to help reduce friction. The grease will last longer than paintball oil, but you will still need the oil for the o-rings.
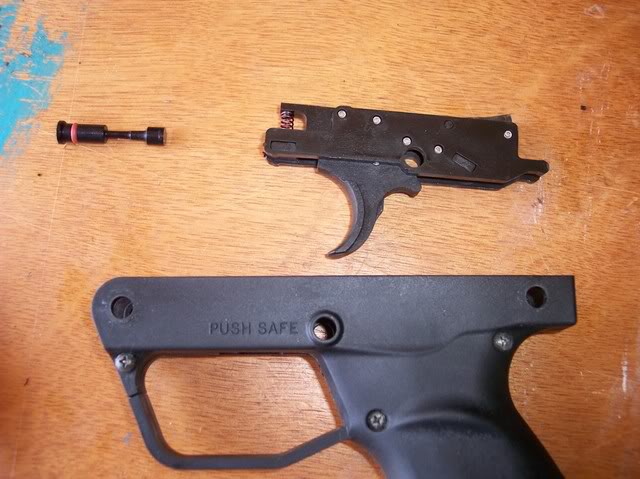
Tippmann A5 Trigger Assembly
The A5 trigger assembly is easily disassembled and upgraded. To remove the trigger group from the frame, just remove the safety pin by pushing it to fire and keep pushing it out (you may have to wiggle the safety and trigger group) and slide the trigger group up out of the frame.
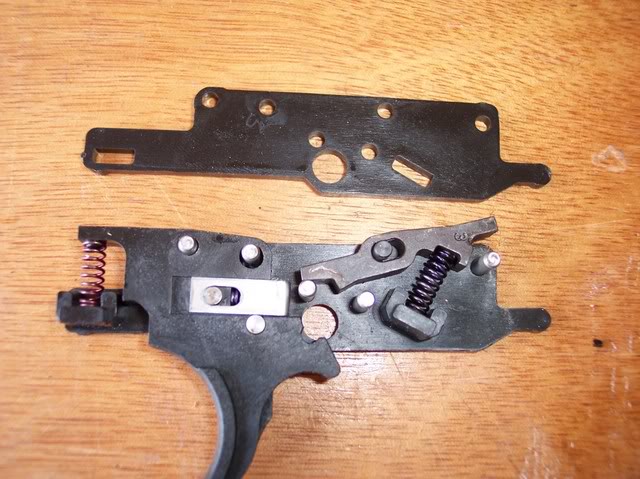
The internals of the trigger group is quite straight forward, just remove the one half and you can see the internals. Keep an eye on both springs, the lighter spring on the left is the return spring and the heavier spring on the right is the sear spring. These springs are not interchangeable.
If you are installing a Response Trigger Kit (RT Kit) you will have to disassemble the grip further by unscrewing the halves of the grip and dropping in the upgrade kit.
Complete Body Disassembly
If you need to do a deep clean or are upgrading the cocking handle you will need to separate the two halves for a complete disassembly. This is quite easy to do and is quite straight forward.
Tools needed:
1/8 hex key
3/16 hex key
Flat Head Screwdriver
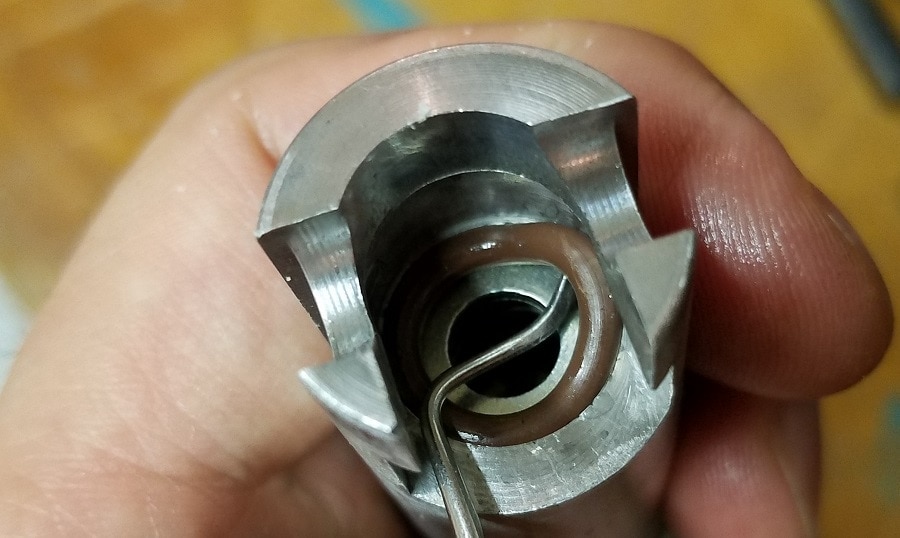
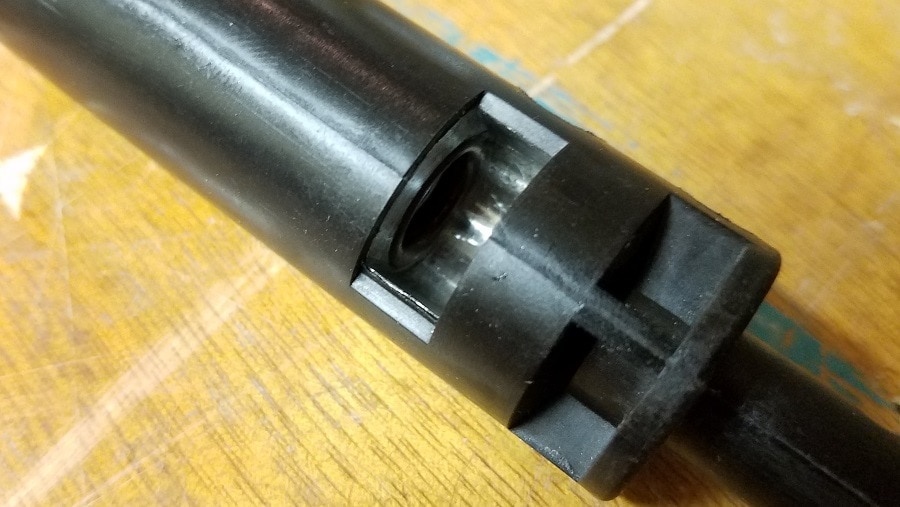
Start by removing the cyclone feed system using your 3/16″ hex key to remove the bolt shown below.
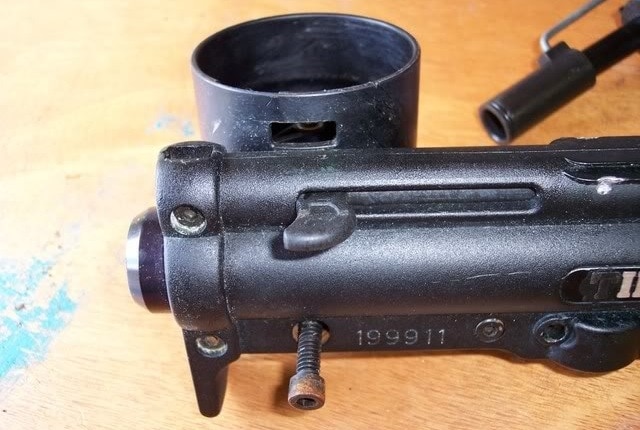
The Cyclone will still be attached from the banjo fitting, use a flat head screwdriver to unscrew it. Set the cyclone feed to the side, we will cover how to dissemble it later.
You can remove the barrel adapter now or remove it after separating the two halves. If you want to undo the barrel adapter now, start by screwing in the barrel, loosening up or removing the front screws, and turn the barrel/barrel adapter counter clockwise about 1/4 of a turn and pull it out.

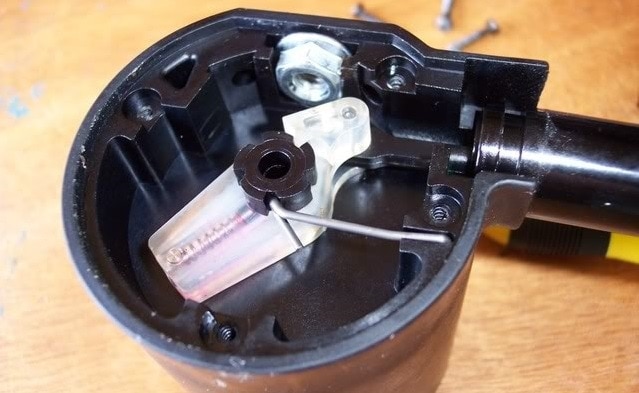
From here you can remove the rest of the screws using the 1/8″ hex key and separate the two halves. When separating it, you will need to keep track of the front sight (not pictured), rear sight, cocking handle, cocking handle spring, front grip nut, tombstone latch, and latch spring.
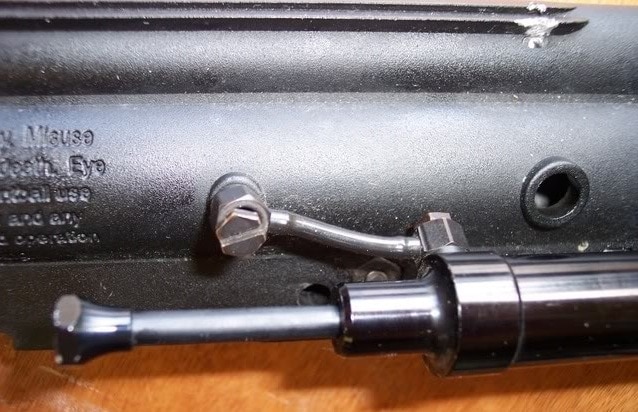
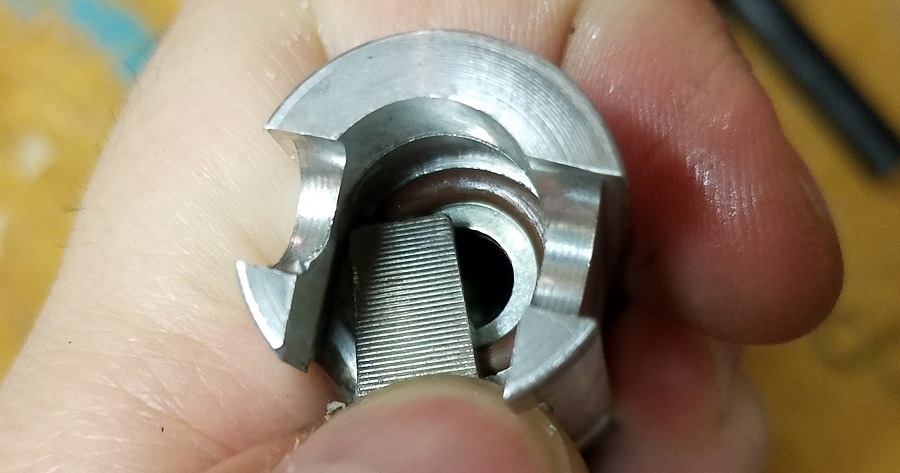
From here, you can clean out the inside bolt channels and apply DOW 33 grease in the high friction areas. While you are at it, inspect the ball detent (orange rubber thing pictured on the left in the picture above). Make sure it isn’t damaged or laying flat. If it is, you will need to replace it. Click here to pick up a manufacture replacement from one of my favorite sellers on Ebay.
When reassembling the halves, you will have to keep an eye on 4 things; the ball detent placement (reference the picture above), the cocking handle spring not sitting in its groove, the rear sight falling out, and the tombstone latch spring moving out of position.
Tippmann A5 Valve Disassembly
Lets go over how to disassemble the Tippmann A5 Valve. Some of the o-rings shown below are different colors as I realized that I needed to replace some o-rings when taking pictures. I have the master Tippmann colorized o-ring kits from Flask paintball. You can pick up some by clicking here to buy a kit from their Ebay shop.
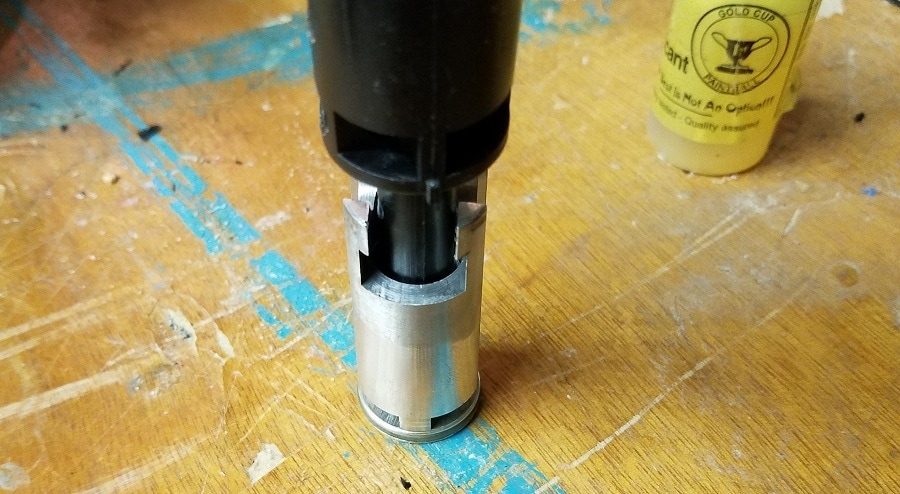
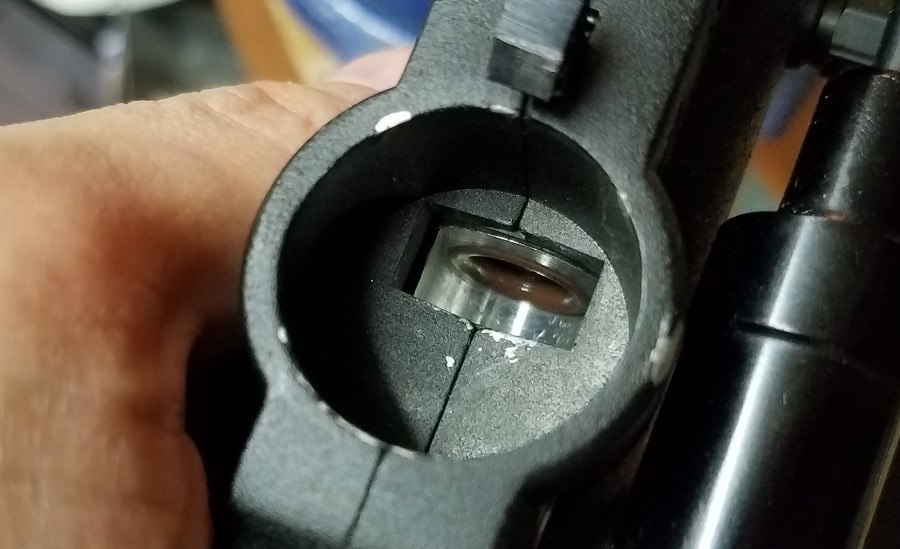
To push the valve assembly out of the power tube, you can try lightly tapping the power tube on a hard surface to slide the valve out or by inserting a flat screwdriver into the rectangular slot on the bottom and pushing it towards the opening in the back.
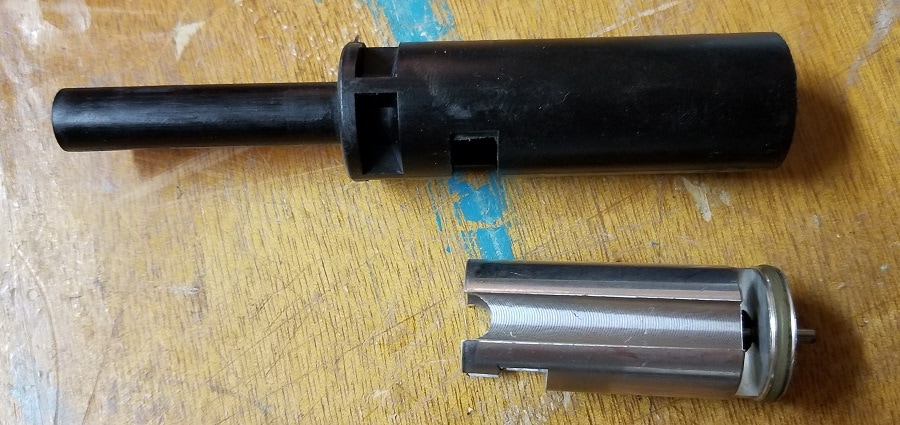
The A5 valve is super easy to disassemble and can be done with an o-ring pick. Start by removing the retaining o-ring held in place by a recessed groove in the valve.
Then slide the contents of the valve out as shown below. The brass disk and o-ring will need a pick to be removed. This o-ring can be the cause to a lot of valve leaks and needs to be inspected.
When putting everything back in the front o-ring first and then insert the front brass valve with o-ring groove facing down and seat firmly in place with a dowel or powertube tip as shown below. Then lightly oil and insert the rest of the internals
To re-seat the retaining o-ring, use a flat screwdriver to pres it back in place to hold in the internals.
When sliding the valve back in, make sure you align the valve cutout with the powertube cutout shown below. If they are slightly misaligned, just use a screwdriver or allen key to rotate the valve in the power tube so that it lines up correctly.
Cyclone Feed Disassembly
The cyclone feed can be a bit confusing to someone who has never opened one up before, especially when we go to putting it back together.
You don’t normally have to disassemble the cyclone for maintenance as it is sealed away from paint and dirt. However, if you need to replace parts or wish to upgrade the parts follow the steps below.
To start off, first remove the screw in the middle of the cyclone feed paddles shown below.
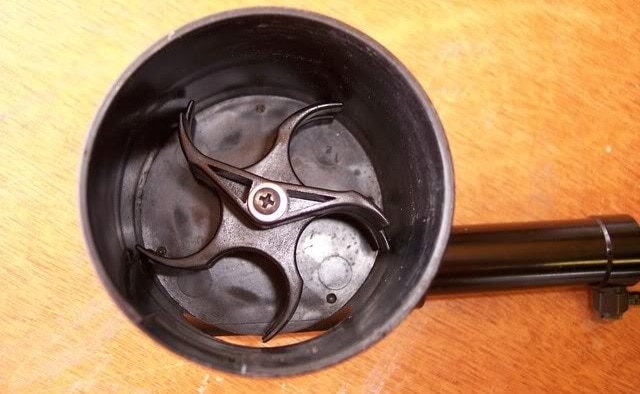
Then, use a small Phillips screwdriver to remove the bottom plate of the Cyclone feed.
Inside you will see the ratchet system, some of the older versions may not be the same color but the shapes are nearly identical. If you wish to update to the current cyclone internal revision, contact Tippmann for details.
If you are going to be upgrading the internals to the all metal versions, remember how all the pins and springs are place inside of the ratchet. Hold on to the old springs and pins as some of the upgrades require you to use the old springs.
From here, you can fully disassemble the entire ratchet and piston assembly.
At this point, you can add some DOW 33 grease on the ratchet assembly friction points to keep things running smooth. I wouldn’t use paintball oil in the cyclone feed as it is too thin to stay in place for very long.
When you go to reassemble the cyclone system, make sure all the springs and ratchets are in the correct locations and don’t over tighten the single screw holding the paddles down or you will strip the threads.
When you attempt to reinstall the piston to the housing, you will have to manipulate the black stopper shown below. You will have to push it into the housing before sliding it back in the grooves on the cyclone feed.
After this, reassembly is quite easy if you reference the pictures above and make sure the paddles are facing the same direction as shown above.
Reassembling Your Tippmann A5
Reassembly is just the reverse of disassembly, but you will have to make sure that the powertube and valve assembly is inserted correctly. The cutout of the powertube needs to face down towards the hose inlet. There will be a little nub on the top of the power tube to help align everything while it slides in.
TIP: When sliding the bolt and valve assembly back in, do not push it in by the bolt. Doing this can and will unseat the o-ring inside the valve and disassembling the valve. If you do pop the valve assembly loose, you will be able to see it in the air inlet. This o-ring is held in place by the tombstone/hose assembly, but as it isn’t installed yet there is noting supporting the pressure on the valve.
You can instead use a screwdriver or hex key to push the valve in place through the trigger grouping slot.
TIP: If the valve wont move two things may be hindering it. One is the velocity adjuster, check to make sure it isn’t moved out to the point where it is snagging the body. Just screw it back in with a 9/64: hex key so the screw is no longer touching the body. If that isn’t the case, the body screws may be too tight, just loosen the body screws with the 1/8 hex key and try again.
Something you can do to help prolong the life of your Tippmann is to put about 5 drops of paintball oil in the ASA, air it up, and cycle a few shots to lubricate the valve.
What Should You Upgrade on Your Tippmann A5?
The best upgrades you can install on your A5 to significantly increase performance is a good barrel like the CP Combat Classic barrel and an E-Grip. Anything extra won’t really give significant improvement and may actually cause reliability problems.
CP Paintball Barrel – https://amzn.to/33K7z3v
Tippmann A5 E-Grip – Check Ebay for great prices
Cyclone Feed Upgrades
My experiences with upgrading the cyclone feed on the A5, X7, and Phenom have shown that the stock cyclone internals are far superior to any upgrades on the market in terms of reliability and longevity.
Squishy paddles are nice upgrades, but they wear out fast causing misfeeds. The paddles will either get too soft or the entire paddle itself will slip on the shaft, no longer lining up properly with the feed port. If you feel the need to get one do not pick up a generic version, they wear out super fast. The TechT version is the best version on the market and can be picked up on Amazon at a great price here: https://amzn.to/36YRPvB
I myself would advise against upgrading the ratchet system with an all metal version, especially an aluminum version. I have noticed that the aluminum versions wear out super fast and start skipping after medium use.
Upgrading piston and piston housing provide little to no real benefit for normal use. Matter of fact, I have had issues with the QEPH and other piston housings allowing too much air to escape too fast and not cycling properly.